My drive suddenly changed to a RAW partition, and now I can’t open it or access important files. Windows keeps asking me to format it, but I’m trying to recover data without losing anything. I need advice on safe RAW partition recovery methods, tools, or steps that might help me restore access to the files without formatting the drive.
When Windows flips a partition to RAW, I would not hit Format. I know it pops up like the obvious fix, but if your files matter, it’s the wrong move to start with. RAW usually means Windows stopped reading the file system. It does not mean your data vanished on the spot.
The first thing I’d sort out is simple. Are you trying to save the files, or are you trying to make the partition usable again. If the data matters, I’d treat repair as step two, not step one.
This is the order I’d follow:
- Do nothing to the RAW partition yet.
- Pull the files off to a different drive.
- Only after that, try to repair the partition.
- If repair goes nowhere, rebuild the partition and format it.
Get the data out first
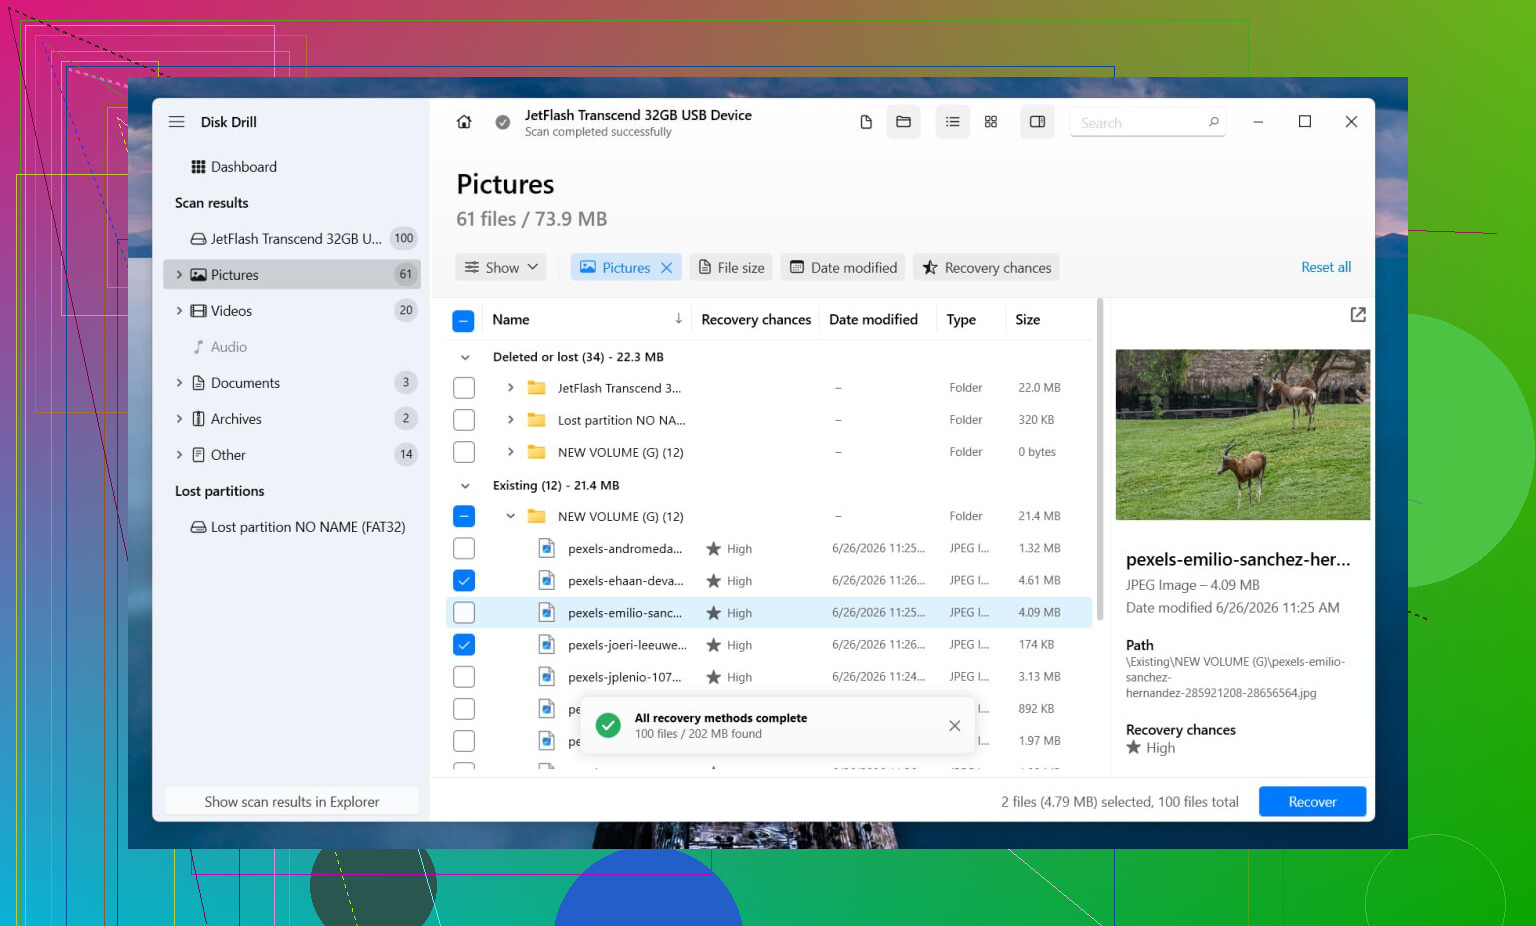
I’d start with Disk Drill. I used it in a case where Windows saw the drive but refused to read the volume, and it did a decent job of trying more than one recovery route without me having to micromanage it. When some file system info is still there, it often restores files with folders and names intact. When the file system is too far gone, it falls back to file signature scanning and hunts for supported file types by pattern instead.
The preview feature matters more than people think. I’ve had scans show thousands of files, then the preview made it obvious which ones were fine and which ones were junk.
The steps are plain enough:
- Install Disk Drill somewhere else, not on the affected partition.
- Launch it and pick the RAW disk or partition.
- Click Search for Lost Data. On an external drive, use Universal Scan if it asks. I’d only switch to Advanced Camera Recovery for footage from cameras, action cams, or drones.
- Let the scan finish. Don’t cut it off early unless the drive is acting sick.
- Preview the files you care about.
- Recover them to another physical drive.
If the drive is dropping offline, freezing, or making the system hang, I’d image it first. Disk Drill includes a sector-by-sector backup option, which is what I’d use before poking at the original any more. Working from an image is slower, sure, but it puts less wear on a drive that might already be on its way out. I learned this one the annoying way.
Repair comes after recovery
Once your files are somewhere safe, then I’d see if the partition is worth fixing.
If the partition used to be NTFS, CHKDSK sometimes helps with boot sector damage or file system errors. Sometimes. I would not run it before recovery because it writes changes to the volume, and if the structure is shaky, those changes are not always helpful. If the original file system was FAT32 or exFAT, I’d skip CHKDSK entirely. It won’t do what you want there.
If CHKDSK fails, or if I want a better shot at restoring the partition layout itself, I’d move to TestDisk.
- Open testdisk_win.
- Create the log file.
- Select the problem drive.
- Accept the detected partition table type.
- Pick Analyse.
- Run Quick Search. If it misses the partition, run Deeper Search.
- If it finds the correct partition, use Write, then reboot.
If TestDisk still comes up empty, I wouldn’t keep burning hours on random repair tools from old forum posts. At some point the practical move is to rebuild the volume in Disk Management, make a New Simple Volume, do a quick format, and copy your recovered files back onto it.
Two things people skip over
First, SSDs are touchy here. If the RAW partition sits too long and TRIM kicks in across blocks tied to deleted data, recovery odds drop hard. I wouldn’t leave an SSD parked for days while deciding what to do.
Second, if the drive clicks, vanishes, reconnects at random, or shows up only sometimes, I’d stop the do-it-yourself route. Those are hardware-failure signs more often than not. Pushing a failing drive tends to make the next recovery attempt worse, not better. If the files are one-of-a-kind, a recovery lab starts making sense fast.
13 Likes
Do not format it. Start by checking if the problem is logical or physical.
My order is a bit different from @mikeappsreviewer on one point. I would test the drive health before doing a long scan. If SMART shows bad sectors climbing, or the drive disconnects, stop stressing the original disk. Clone it first with something like HDD Raw Copy Tool or ddrescue, then scan the clone. That saves wear and gives you a second shot if the first scan goes bad.
For Windows checks:
- Open Disk Management and note the disk size and partition layout.
- Check SMART with CrystalDiskInfo.
- Try a different cable, port, or USB enclosure if it is external.
- If the drive looks stable, scan for RAW partition data recovery.
Disk Drill is a solid option here because it handles lost partitions and RAW file systems well, and the preview helps you sort real files from garbage. Recover to another drive, never back to the same one. If folders are missing, sort by file type and date. That often saves time.
I would skip chkdsk until after your files are safe. On a RAW volume, it often does nothing useful, and sometimes makes later recovery messier. TestDisk is better if your goal is restoring the partition entry itself, not file-by-file recovery.
Search phrase wise, think ‘how to recover data from a RAW partition without formatting’ or ‘RAW drive file recovery on Windows’. Also, this short clip on recovering files from a RAW partition without formatting is relevent.
If the disk clicks, hangs, or vanishes, stop DIY. Lab time. That part sucks, but pushing a dying drive is how people lose the last readable sectors.

Don’t format it. That popup is Windows basically saying “I can’t read this, wanna erase it so I can?” which is not the same thing as fixing it.
I mostly agree with @mikeappsreviewer and @codecrafter, but I’d add one thing they kinda danced around: check whether the RAW issue is fake before doing a huge recovery job. I’ve seen drives show as RAW just because the USB bridge/enclosure was flaky. If it’s an external drive, try a different cable, different port, and if possible connect the bare drive another way. Sounds dumb, sometimes works.
What I would do:
- Stop using the drive.
- Check SMART/health if the drive still responds.
- If it’s unstable, clone/image first.
- If it’s stable, recover files off it to another disk.
- Only then worry about making the partition usable again.
I would also avoid getting too repair-happy. TestDisk is great for partition repair, sure, but if the file system itself is trashed, “restoring” the partition entry won’t magically make your files readable again. That’s where file recovery software is the more practical move. Disk Drill is solid for RAW partition recovery because it can scan past the broken file system and still pull files by structure or signature. The main thing is recover to a different physical drive, not the same one. People mess that up alll the time.
One more thing: if this is an SSD, don’t let it sit forever while deciding. Recovery chances can get worse.
For extra reading, this step-by-step lost partition recovery guide for external hard drives is worth a look too.
One small disagreement with @codecrafter and @mikeappsreviewer: I would not jump to any write-action tool, even TestDisk, unless you already have a clone or the files are backed up. RAW can be just a broken partition record, sure, but it can also be the first visible symptom of a drive that is quietly dying.
What I’d add to the thread is this: check whether the partition still has a recognizable boot sector or file system header before doing a full recovery pass. A hex viewer or partition tool can sometimes show NTFS, exFAT, or FAT signatures near the start of the volume. If the signature is there but Windows still says RAW, that points more toward corrupted metadata than total file loss. Different problem, different risk.
Also, watch the reported capacity carefully. If the drive suddenly shows the wrong size, like 0 bytes, absurdly small, or a weird truncated number, that is not a normal file system issue. That leans hardware, firmware, or enclosure trouble. In that case, I agree more with @caminantenocturno: stop swapping repair commands around and treat the disk itself as suspect.
On recovery software, Disk Drill is a reasonable pick if you want a GUI and file preview.
Pros:
- easy to use
- good preview support
- handles RAW and lost partitions decently
- can recover by file system data or signatures
Cons:
- deep scans can take forever
- recovered filenames/folders are not always preserved
- free recovery limits depend on platform/version
- not the best choice if you need highly manual control
If Disk Drill doesn’t show a sane folder tree, that usually means the file system metadata is too damaged and you’re in carve-only territory. Then focus on your highest-value file types first, not everything. That saves time and storage space.
One more practical tip nobody mentions enough: disable automount before reconnecting a flaky disk in Windows. It reduces the chance of the OS trying to “help” by mounting or writing metadata automatically.