I accidentally deleted important files from my external hard drive and need to recover them fast. I’ve narrowed it down to Disk Drill and Recuva but I’m not sure which one works more reliably for external drives, especially for deep scans and large capacities. Can anyone share real-world experiences or tips on which tool I should use first and why?
Alright, here is how it went for me with Disk Drill, after way too many nights of staring at “empty” SD cards and dead drives.
I shoot photos and video on the side. Not as my main job, but enough that every week I am juggling SD cards, SSDs, spinning rust, and a laptop that travels more than I do. Stuff gets deleted, cards get yanked out mid-copy, external drives lose power when someone kicks a cable. It keeps happening.
Over a few years I went through a pile of recovery tools. Paid, free, sketchy, “enterprise”. One of them even wrote junk onto the card it was supposed to recover from, which nuked what little data was left. After that mess, a friend who works in IT sent me this link and told me to quit experimenting and use Disk Drill already:
https://www.reddit.com/r/DataRecoveryHelp/comments/1qi1apk/disk_drill_review/
How the first run went
I installed it, pointed it at a card I had formatted by accident, and waited to get hit with the usual mess of “quick scan / deep scan / raw scan / super hyper algorithm mode” stuff.
None of that happened.
Pick drive. Hit scan. That was it.
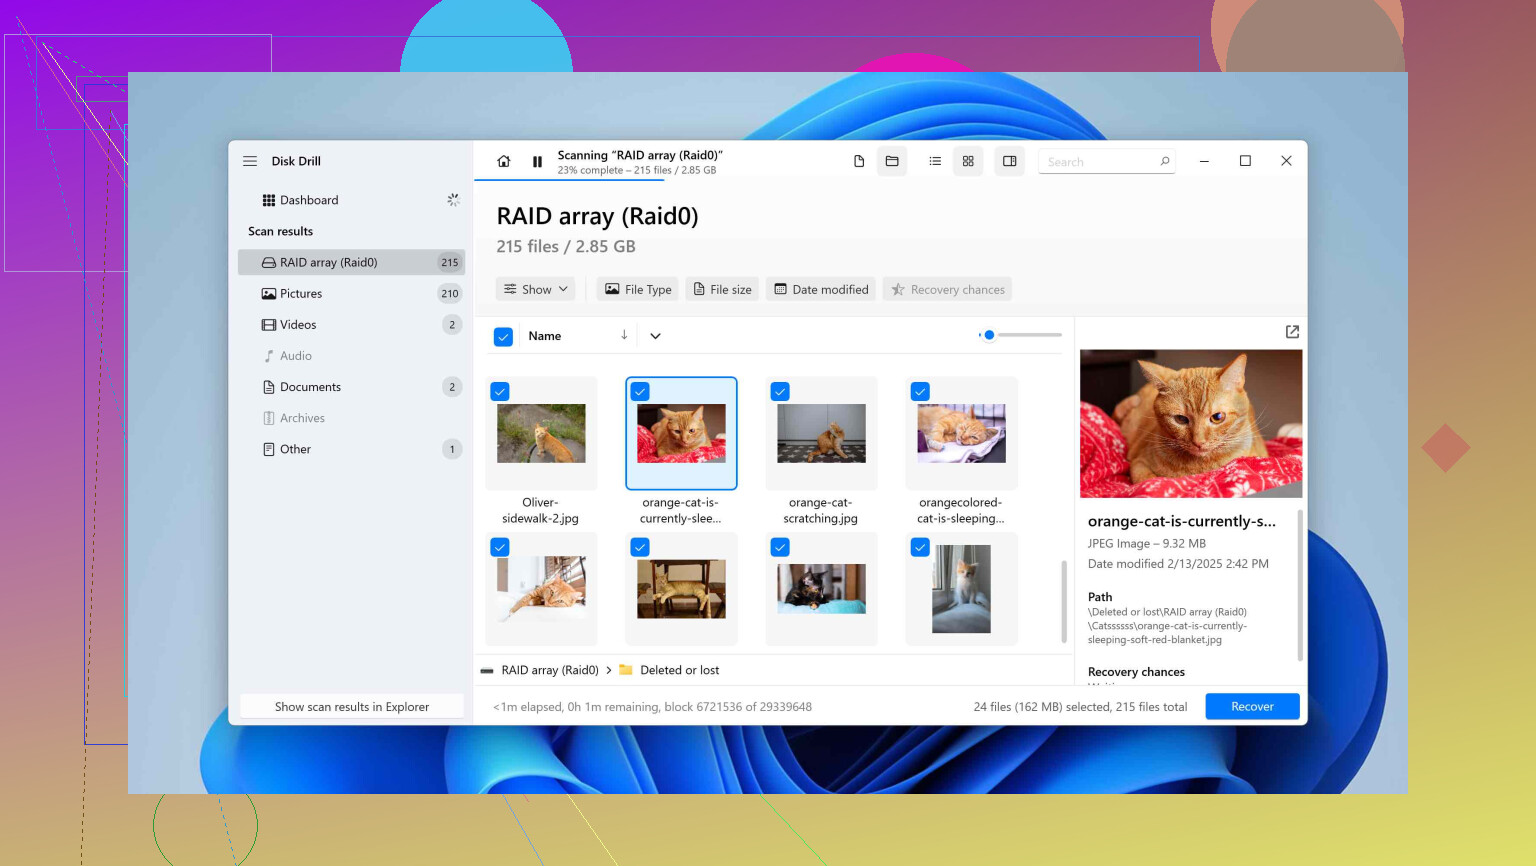
Under the hood it is obviously doing different passes, file system level, raw scan by signatures, all that. But you are not buried in options. Files start showing up while it is still scanning. You see folders fill up, counters tick up, thumbnails appear. You can start recovering before the scan ends.
I gave it to someone who barely understands folders vs files. They figured it out without calling me. That alone sold me on the interface.
About the speed
I tracked a few scans because I was curious.
• 32 GB SD card with photos: around 2 to 4 minutes over USB 3
• 500 GB external SSD: roughly 15 to 20 minutes, again USB 3
• 1 TB internal NVMe: longer of course, but I was previewing files maybe 5 to 10 minutes in
The big difference compared to some other tools I tried is that you do not sit staring at a progress bar waiting for 100 percent before you see anything. Disk Drill starts listing files quickly, and you can cherry pick what you need. When a client is asking where their pictures are, “I can start pulling them now” is better than “wait an hour and I will know”.
On spinning disks, the time goes up a bit, but the pattern is the same. Results appear progressively, rather than at the end.
File types it handled for me
The marketing says “hundreds of formats”. Most tools say that. I cared about one thing: RAW and video.
Short version of formats I personally recovered:
Photo RAW it got back properly for me:
• Canon: CR2, CR3
• Nikon: NEF
• Sony: ARW
• Olympus: ORF
• Panasonic: RW2
• Fuji: RAF
• DNG from various stuff
These were not random binary blobs with broken previews. I compared a few recovered CR3 and ARW shots against my backups, pixel by pixel zoomed in Lightroom. No visible difference, all metadata intact, editing worked normally.
On top of that, it handled the boring stuff:
• JPEG, PNG, TIFF
• MP4, MOV, AVCHD clips
• WAV, MP3, FLAC
• DOCX, XLSX, PPTX, PDF
• Zip and a few archive formats
I also saw it list things I do not use every day like ProRes, RED R3D, and some 3D / media project formats. I did not test those heavily, but seeing them there gave me confidence someone thought about more than “photos and Word docs”.
The wedding card meltdown
This is the one story that locked Disk Drill in as my go-to.
Friend of mine shoots weddings full-time. Two 64 GB SD cards, all day, ceremony plus reception. She gets home, pops card 1 into the reader, starts copying, and the PC freezes halfway. After a reboot, the card shows as RAW. No file system. Zero files.
She called me late, definitely not calm.
I went over with my laptop, installed Disk Drill, set it to scan the RAW card, and let it run. It took maybe 4 or 5 minutes. The results screen showed:
• ~800 RAW files
• ~400 JPEGs
We opened random previews all over the timeline. Getting ready, ceremony, reception, dance floor. Every one that we checked loaded, full resolution, no visual glitches.
Recovery itself took another few minutes to a different drive. Next morning she pulled them into Lightroom and edited like nothing happened. That card went in the trash. Disk Drill stayed.
She paid me in wine and bought her own license the next day.
Why the preview matters more than it looks
Most recovery tools spit out huge lists of files with generic names. A lot of those are trash or partially overwritten. You only notice after recovering thousands of them.
Disk Drill’s preview window saved me hours:
• Click on any photo: thumbnail and full-size preview loads if the file is intact enough.
• Same for common video formats, office docs, PDFs.
• You can quickly flip through a bunch of files with the arrow keys and mark what you want.
Along with that, each file gets a recovery chance rating:
• High
• Average
• Low
They are not magic, but they have been pretty accurate for me. High usually opens fine. Low often breaks or refuses to open. So you get a realistic sense of what is worth spending time saving, especially for multi-gigabyte video.
If you are paying for an electrician or lawyer or whatever and you need proof for a specific set of images or documents, that preview plus rating combo keeps you from sinking time into junk.
The special camera video recovery
This part surprised me the most.
If you ever tried recovering GoPro or drone video from a formatted or corrupted card, you have probably seen this: recovery tool finds .MP4s, you restore them, try to play them, and the video either refuses to load, plays a few seconds, then freezes, or has broken audio.
Cameras store video in pieces across the card. Once the file system is gone, most basic tools grab whatever chunks have matching signatures and glue them in whatever order they come up. That leads to broken videos.
Disk Drill has an Advanced Camera Recovery mode for specific gear. It supports at least these ones that I used or saw listed:
• GoPro
• DJI drones
• Canon, Nikon, Sony, Panasonic DSLRs and mirrorless
• Insta360 action cameras
I fed it a messed up DJI mini drone card. Card had about 6 hours of flying, and Windows wanted to format it. ACR mode scanned it and listed every clip with resolution and length.
After recovery, every single file opened and scrubbed cleanly in Premiere and VLC. No weird jumps, no stuttering, no random cuts mid-clip.
Out of curiosity I ran two other tools on that same card before I wiped it completely. One got a few playable files with glitches. The other either failed to play them or produced tiny clips.
For drone work, mountain biking POV, or anything you shoot on GoPro for clients, that ACR feature alone is enough reason for me to keep Disk Drill installed.
Handling dying drives without killing them
Different story. I had a 2 TB external hard drive that started clicking sometimes. Not non-stop, but enough that your stomach drops when you hear it.
The worst reaction in that situation is to hammer the drive with full scans again and again. Every full pass stresses the heads and surfaces.
Disk Drill includes a byte-to-byte backup function. It lets you clone the entire drive into an image file and then forget about the real drive.
Here is how I used it:
- Launched the backup tool, selected the failing 2 TB drive.
- It gave me a visual map of sectors as it read them. Green, yellow, red blocks.
- It skipped hard-bad spots on the first pass to capture as much healthy data as fast as possible.
- After finishing a general pass, it went back over the trouble areas with smaller reads.
- You can pause and resume that process if the drive starts getting noisier.
When that was done, I unplugged the external drive and kept it in a drawer. From then on I worked on the disk image only.
Disk Drill treats that image like a physical disk. You pick it and run scans on it, try different scan types, filter, tag, whatever. No more wear on the original drive.
End result: recovered about 1.8 TB out of 2 TB. A few weeks later the drive would no longer spin up properly. Without that clone, that data was gone.
S.M.A.R.T. checks that saved me twice
Disk Drill reads S.M.A.R.T. data from drives. It is not a full monitoring station for a corporate server room, but it shows:
• Temperature
• Reallocated sector counts
• Pending sector counts
• Reported errors
• Power-on hours
I checked this screen occasionally and caught two drives where reallocated and pending sectors were creeping up while errors were climbing. Both were still working at the time, no obvious problems in daily use.
I copied all data off them and retired them. A few weeks later, one of them started failing hard during sequential reads.
Nothing heroic here, it is basic health info, but having it inside the recovery app is useful. You see the red flags early instead of waiting for the OS to hang during a transfer.
The “Recovery Vault” thing I ignored at first
This feature sat there for months before I bothered turning it on. That was a mistake.
You can enable Recovery Vault for specific folders or drives. From that point, Disk Drill tracks metadata for files deleted in those locations. It does not keep full duplicates of files. It keeps enough details so if you delete something important and empty the recycle bin, Disk Drill has a map of where that file lived and what it was called.
In practice, it worked like this for me:
• I enabled it on my main “Projects” folder and desktop.
• Later, I removed a folder full of reference shots, realized it a few days after clearing the recycle bin.
• Recovery Vault made Disk Drill list those files with full original paths and names.
• Recovery was quick and clean, way more reliable than blind scanning.
It behaves like a basic safety net, especially on folders you touch a lot. You set it and forget it.
Working across Windows and Mac without friction
My desk machine runs Windows. My portable setup is a MacBook. Buying one license and getting installers for both was nice. The important part for me though was scan session portability.
Flow I use sometimes:
• Start scanning a big drive on the Windows desktop where it is physically plugged in.
• Once Disk Drill finds the stuff I care about, I save the scan session.
• Copy that session file to the Mac.
• Open it in Disk Drill on macOS, continue filtering, previewing, and selecting files.
So the heavy hardware is at the desk, but you do not stay chained to it to process results. I have not seen that in other recovery software I tried.
File systems it recognized without extra tools
Disk Drill handled all the usual stuff, plus a few that saved me trips to Linux:
• NTFS
• FAT32
• exFAT
• HFS, HFS+
• APFS
• EXT2, EXT3, EXT4
• BTRFS
• ReFS
• RAW devices with no valid file system
One time a coworker handed me a USB stick from a Linux box with EXT4 on it. My Windows machine saw it as “unknown”. Disk Drill, on the same machine, saw EXT4 and showed the full directory tree. No Linux USB boot, no extra driver installs.
RAID and Storage Spaces
I do not run RAID arrays personally, but I tried Disk Drill on a friend’s Windows Storage Spaces pool that glitched after an update. It recognized the pool layout and let us scan the virtual volume.
According to the docs and menus it can rebuild software RAID types like:
• 0
• 1
• 5
• 6
• 10
• 1E
• JBOD
Plus Windows Storage Spaces. I did not go crazy testing every level, but seeing it detect and handle the pool was reassuring for anyone using those more complex setups at home.
Situations where it helped me recover data
Here are concrete cases where Disk Drill recovered stuff I needed:
• Corrupted SD card from a stills shoot after someone removed it mid-copy.
• Formatted microSD from a drone, ACR mode.
• Half-dead 2 TB external drive with clicking, cloned via byte-to-byte backup.
• Accidentally formatted 128 GB flash drive with LUTs, presets, and some contracts.
• NAS that went weird after a power cut, individual disks scanned for EXT4.
In each case, I walked away with usable files, not half-broken junk.
If you are trying to decide
I usually tell people to do one simple thing before paying for any tool:
- Install the free version of Disk Drill.
- Run a scan on the drive or card with missing data.
- Use the preview window to check whether your important files show up in full.
- Look at the recovery chance indicator on your key files.
If the files you care about are visible and preview correctly, then paying to unlock recovery usually makes sense. If not, you probably need a lab or different approach.
For me, after going through multiple apps that either confused me or mangled data, Disk Drill became the default. I still keep other tools around for niche tasks, but when someone messages me saying “I think I formatted the wrong drive”, this is the one I point them to first, and I have not regretted that yet.
19 Likes
Short version. For external drives with important files, Disk Drill is the better bet than Recuva in most real cases.
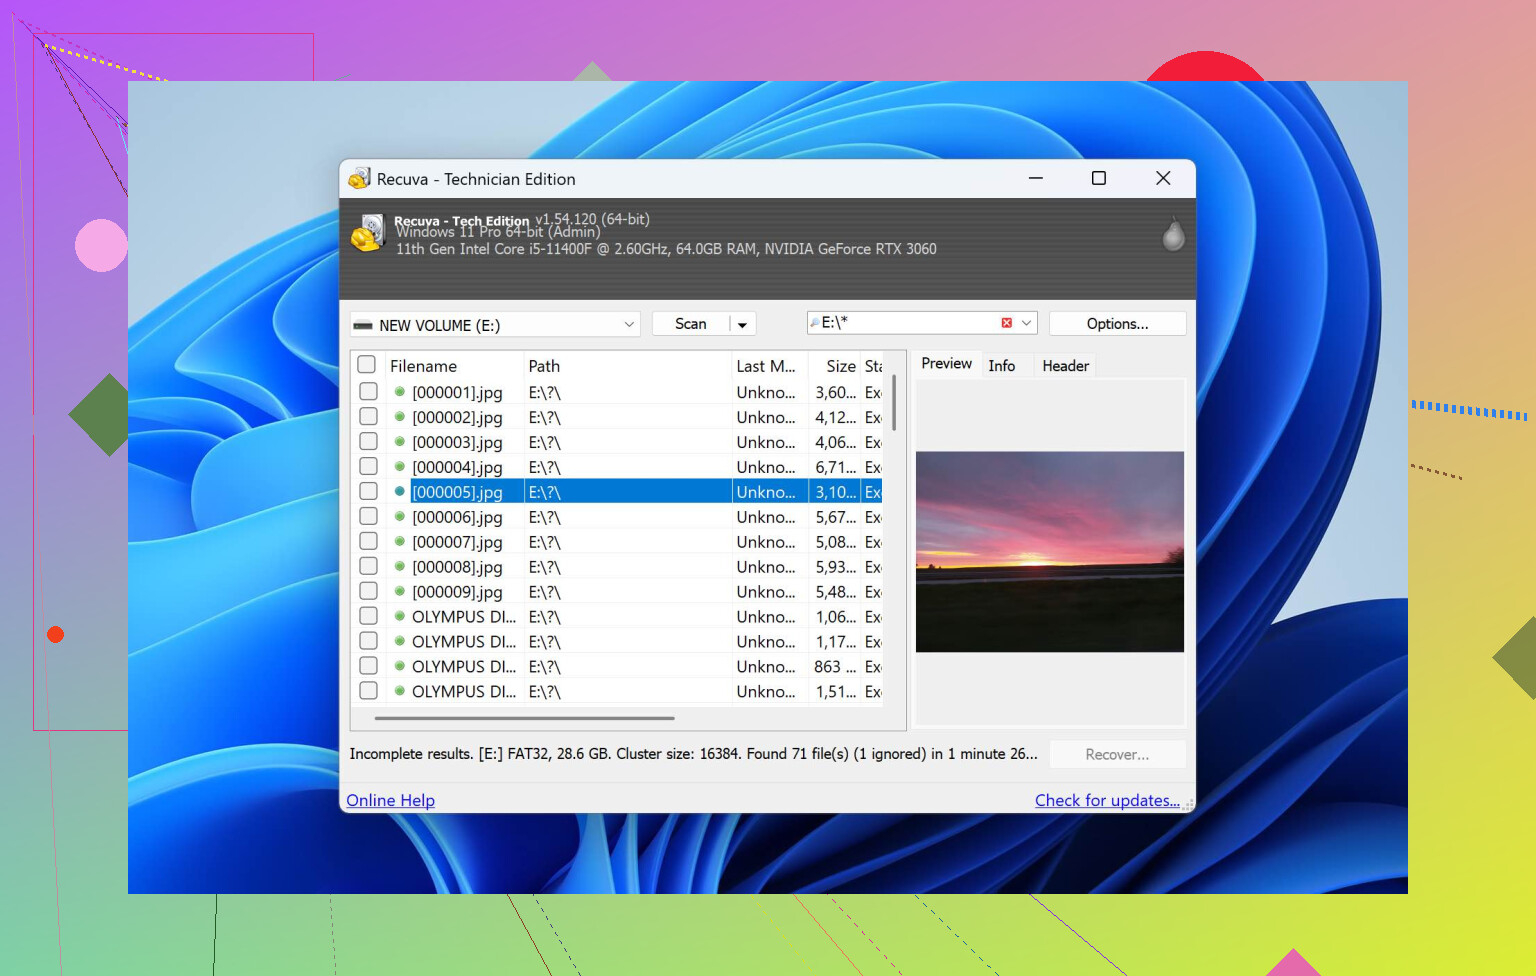
Recuva is nice if:
• You want free and simple.
• The drive is healthy.
• Files were deleted recently, file system still OK.
Disk Drill is stronger when:
• The drive was unplugged mid transfer or power loss.
• The file system shows as RAW or asks to format.
• You need good previews before paying.
• You care about photos, video, or mixed file types.
Where I partly disagree with @mikeappsreviewer is on “use Disk Drill already and stop testing”. I still keep Recuva as a first pass when the situation is low risk, for example a quick undelete on a USB stick. Recuva is fast and sometimes enough.
For an external drive with important data and time pressure, I would do this:
- Stop writing to that drive. No copies, no chkdsk, no defrag.
- Install Disk Drill on a different drive, not the one you want to recover.
- Run a scan on the external drive.
- Use previews and recovery chances to confirm your key files look intact.
- If you see your files open fine in preview, pay and recover to a separate drive.
If Disk Drill does not show the files in good shape, Recuva will rarely do better on a damaged or flaky external. At that point a lab is safer.
About “what is data recovery” in case you are new to this. Data recovery is the process of getting back deleted, lost, or corrupted files from storage devices like external drives, SSDs, and SD cards. Software scans the drive for file system records and raw data, then tries to rebuild your original files so you can copy them to a safe place. If you want a clear overview of how it works and what to expect, this guide helps a lot: how data recovery works and what you should expect.
Given what you described, I would start with Disk Drill. Use Recuva only if Disk Drill’s scan shows nothing useful and you want to double check before calling a pro.
Disk Drill is the safer pick for your situation.
Recuva is fine for “oops, I deleted a folder yesterday on a healthy drive” stuff. On clean NTFS, no corruption, no weird disconnects, it can undelete fast and for free. That is basically where its strengths stop.
Your case hits the weak spots:
- External drive
- Important files
- Need it to work on the first try
Where I’m a bit at odds with @mikeappsreviewer is the idea that “simple = always good.” Recuva is simple, but it also has not really kept up with messy real-world failures: partial corruption, RAW drives, power-loss mid copy, etc. On those, it tends to:
- List fewer files
- Miss deeper structures
- Give you more broken / unopenable stuff
@reveurdenuit is right that Recuva can be a quick first pass for low‑risk jobs, but with an external drive that might already be stressed, I actually would not poke it with multiple tools. Every full scan is more wear, especially if it is a spinning HDD.
For your external drive, the reasons I would start with Disk Drill:
-
Raw / damaged file systems
If Windows is showing the drive as RAW or asking to format, Disk Drill usually has a better shot of reconstructing folders and filenames instead of just dumping “file0001.jpg” style junk. -
Preview before paying
Being able to see if a file opens and looks right before you pay is critical. If your key files don’t preview properly in Disk Drill, Recuva is almost never going to magically do better on that same damaged area. -
Mixed content
If you have more than just Word docs (photos, videos, archives, etc.), Disk Drill’s file-type support and recovery quality is typically stronger. Recuva sometimes “recovers” video that plays a couple seconds and dies. -
Handling flaky externals
With external HDDs that have been yanked, bumped, or powered off mid-transfer, Disk Drill’s approach to scanning and imaging is more mature. This matters if the drive is starting to misbehave mechanically.
Where I slightly disagree with @reveurdenuit: they still like running Recuva as a quick sanity check after Disk Drill. Personally, if Disk Drill finds nothing or only shredded files, I would not waste more time with Recuva. At that point you are in “data recovery lab” territory, not “try a second free app and pray” territory.
If the drive is physically clicking hard, freezing your system, or disconnecting:
- Stop immediately
- Do not run Recuva
- Use Disk Drill’s imaging function first or, if the data is business‑critical, skip straight to a pro lab
If it is just a clean accidental delete on a healthy external:
- You could try Recuva first for a very fast undelete
- But given that your files are important and you want one solid attempt, I would still go straight to Disk Drill and recover to a different disk.
And if you later decide you are just done with Recuva in general and want to compare other tools, this rundown of more powerful Recuva alternatives for data recovery is actually pretty useful for seeing what else is out there beyond the usual names.